Mini Plotter V 0.5
Design
The machine was supposed to be a low-cost CNC, but the cost did pose some problems, which were the lower quality of the materials. We could say that the quality of the materials was uncontrollable, which in turn proposed the idea of adding control to the machine so that it could be calibrated accordingly. The assembly of the machine is definitely going to be a process, but let’s assume others will have fun with it.

Motor
So with that in mind, I started the design of the gantry. As mentioned, the gantry had diameter adjustment within the gantry with screws, which can be used to adjust the play of the gantry.
We were using 28BYJ-48 stepper motors for the plotter. When I had that motor in my hand, I found out that the motor had some peculiarities:
- The motor shaft was comparatively smaller compared to NEMA 17, which I had previously used, so I had to change the design to mount the pulley other than the motor shaft.
- The motor shaft had an up and down play, which came with the design of the motor. I needed to make a fixer that prevents the up and down motion of the shaft.
These were the challenges that I faced when it came to materials while designing the plotter, which I fixed by adding a fixing part at the top of the motor connecting pulleys and tightening it down to the board.
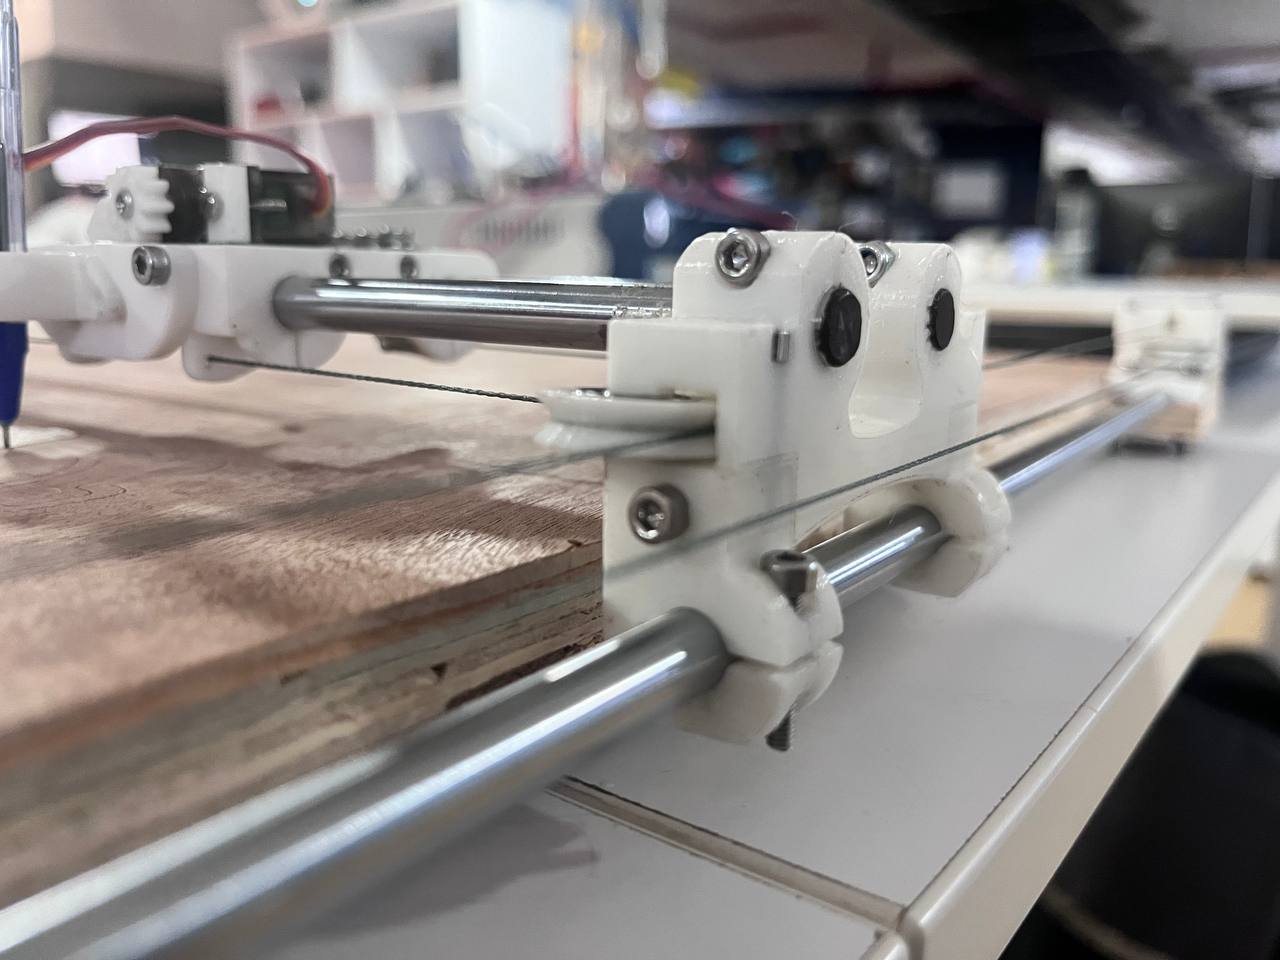
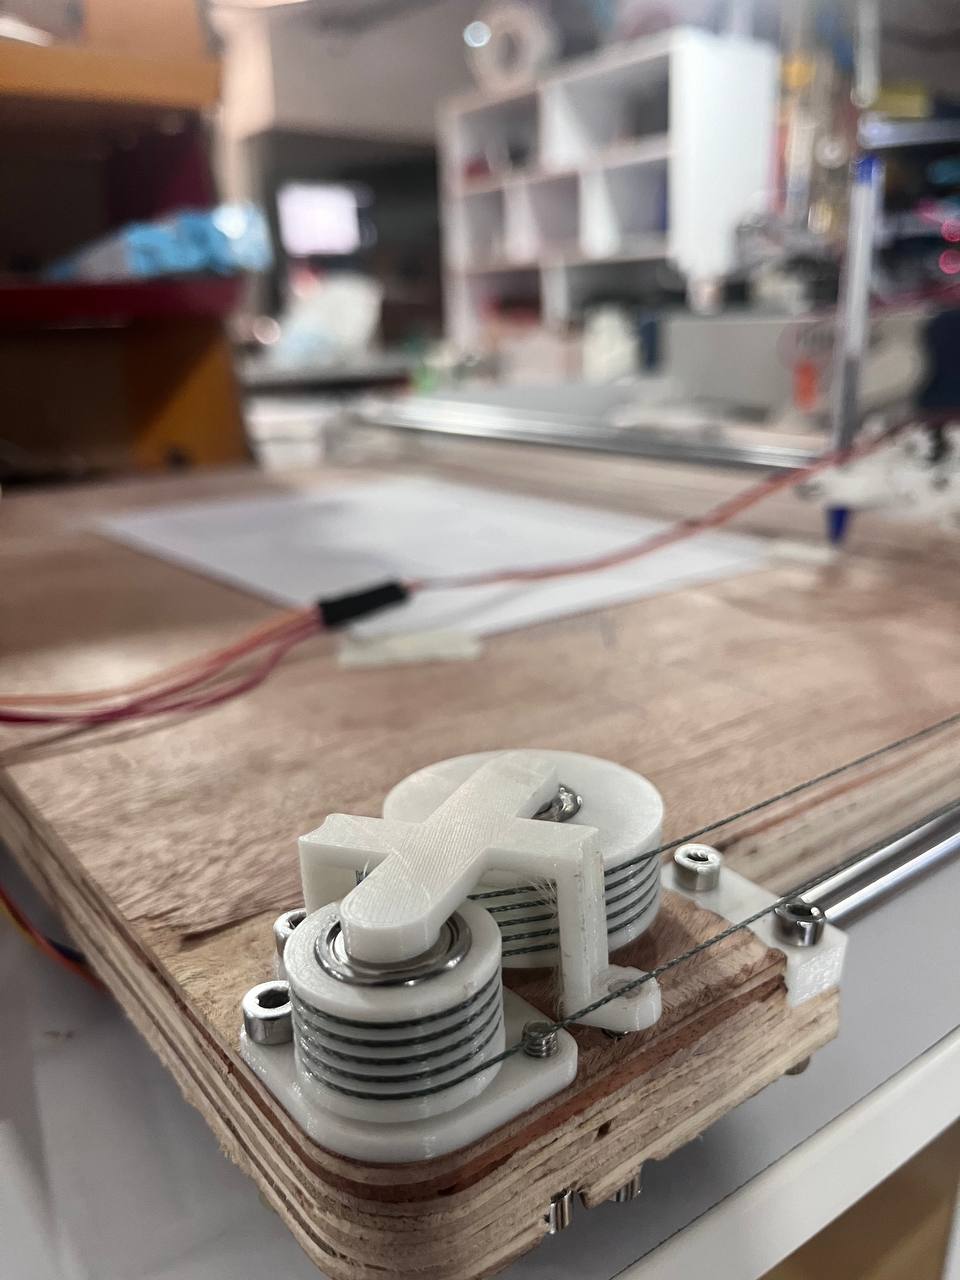
Core XY
The machine is using Core XY kinematics because the gantry needs to be as lightweight as possible. If the weight on the gantry is light, the machine has to run on these stepper motors, so I had to make the gantry as lightweight as possible.
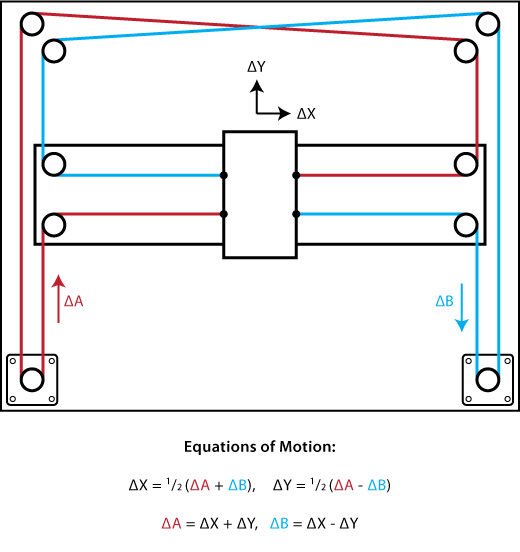
Also, the moving belts of the machine have to be linear with no angle deviation to control the unbalanced forces, so the strings have to be straight. I needed to add a string tightening option to the machine to keep the string in adequate tension.
Base
The base of the machine was built in plywood, which was 2D milled. I arranged the components on the base and 3D printed the parts of the pulleys and assembled them.
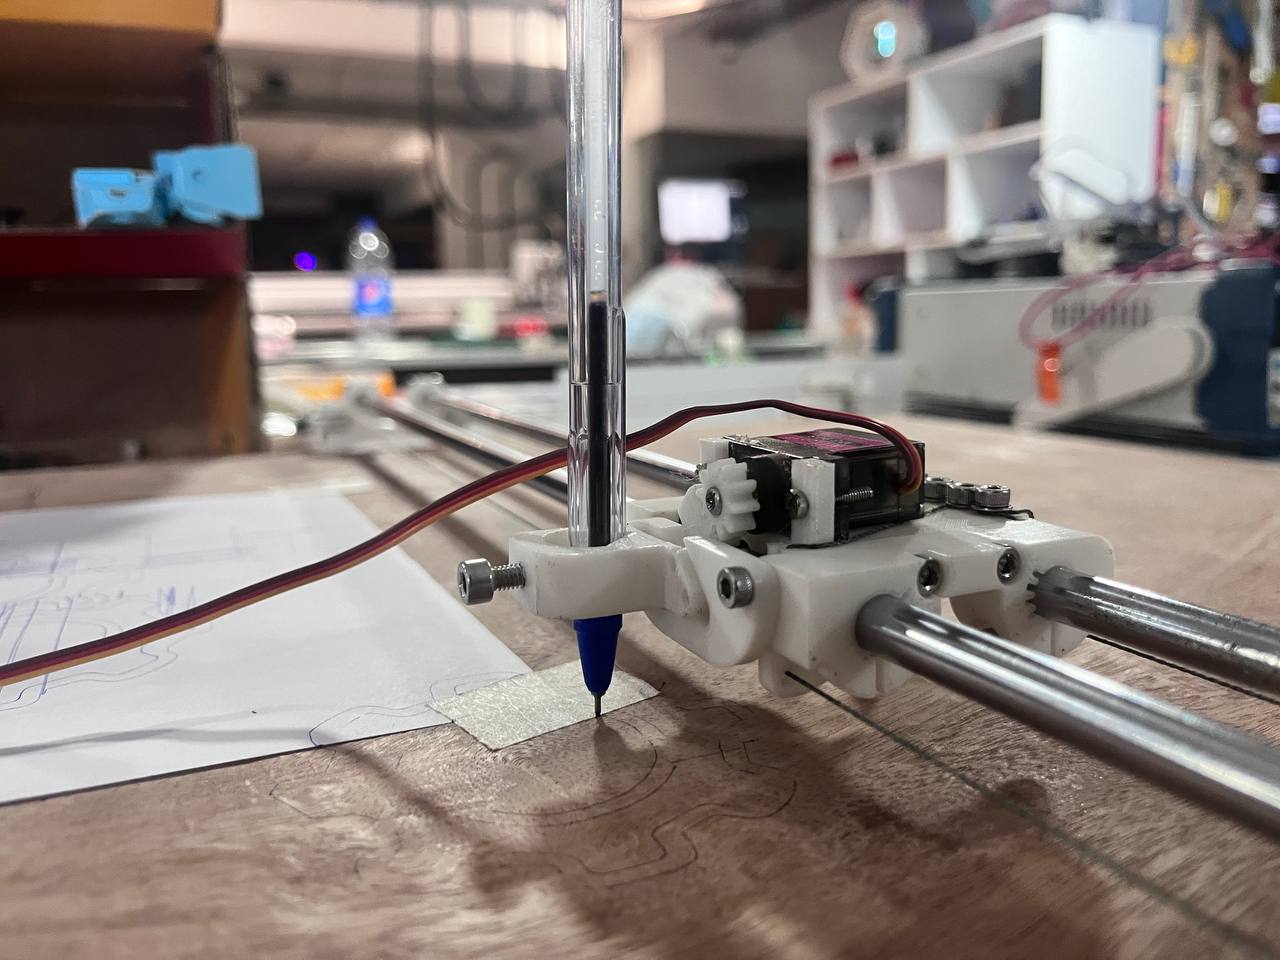
End Effector
The end effector of the machine was actuated by a servo motor MG90 Pro, and the mechanisms were 3D printed. In the end, I felt curious and inclined the Z-axis gantry for fun. No other reason at all, but yeah, it worked. I tested the 3D printed design on different 3D printing clearances and found a clearance that really worked for the machine.
Fab-Plotter Website
The Fab-Plotter is a web application designed to facilitate the conversion of SVG (Scalable Vector Graphics) files into G-code instructions suitable for controlling plotters. This documentation provides an in-depth guide to the application’s functionality, usage instructions, technologies employed, and other relevant details.
Functionality
- SVG Import and Display:
- Users can import SVG files by dragging and dropping them onto the designated area or selecting them using the file input element.
- Once imported, the SVG content is displayed within the application’s interface, allowing users to preview their designs.
- G-code Generation:
- The application generates G-code instructions from the imported SVG files using the ‘svg-to-gcode’ library.
- Users can adjust settings such as feed rate and seek rate to customize the G-code generation process according to their requirements.
- G-code Download:
- Upon generating G-code, users have the option to download the resulting file locally for further use with their plotters.
- Plotter Connection and Communication:
- Users can establish a serial connection with their plotters through the application using the Web Serial API.
- The application provides functionality for sending the generated G-code instructions to the plotter for execution.
- Users can easily establish, maintain, and terminate serial connections with their plotters as needed, ensuring seamless communication.
- Plotter Control:
- The interface includes jog buttons that allow users to control the movement of the plotter, facilitating precise positioning and alignment.
Workflow
Technologies Used
- JavaScript: The frontend logic and interactivity of the application are implemented using JavaScript, providing dynamic functionality and user interface enhancements.
- HTML/CSS: HTML and CSS are utilized for structuring the webpage and styling the user interface, ensuring a visually appealing and intuitive user experience.
- Web Serial API: The Web Serial API is employed to establish serial communication with plotters directly from the web browser, enabling seamless data exchange between the application and the plotter devices.
- SVG-to-G-code Conversion Library: The ‘svg-to-gcode’ library is integrated into the application to convert SVG files into G-code instructions, making them compatible with plotter and CNC machine control systems.
Dependencies
- svg-to-gcode: A JavaScript library used for converting SVG files into G-code instructions, essential for generating plotter-compatible commands.
- svgo: An SVG optimization library employed to optimize SVG files before conversion to G-code, enhancing performance and reducing file size.
Usage
- Importing SVG Files:
- Drag and drop SVG files onto the designated area or use the file input element to select files for import.
- Generating G-code:
- Click the “Generate G-code” button to initiate the conversion of imported SVG files into G-code instructions.
- Downloading G-code:
- After G-code generation, users can download the resulting file by clicking the “Download G-code” button.
- Plotter Connection:
- Connect to a plotter via a serial connection by selecting the appropriate serial port and clicking the “Connect” button.
- Sending G-code to Plotter:
- Transmit the generated G-code instructions to the plotter by clicking the “Send G-code” button.
- Controlling Plotter Movement:
- Use the jog buttons to control the movement of the plotter, enabling precise adjustments and positioning.
- Closing Plotter Connection:
- Terminate the serial connection to the plotter by clicking the “Disconnect” button when communication is no longer required.
Note
- Users should ensure that their web browsers support the Web Serial API for establishing serial connections with their plotters.
- Compatibility with plotter hardware and adherence to G-code standards are essential considerations for accurate rendering of drawings and designs.